Download and and write image “ RASPBIAN STRETCH LITE 2017-11-29” on SD card with Win32DiskImager
If you encounter errors writing the above image :
open “diskmgmt.msc” (Windows start button and type : diskmgmt.msc ) to see what might causing the error.
Please make note that if you make changes in the wrong partition, you may corrupt your Windows system and/or lose data on your storage devices !!!
In my case, removing all the partitions on the SD card, and make a complete new FAT32 partitions, give me a good results of writing the above mentioned image without an issue.
Enabled SSH by placing an empty file named SSH on the root partition
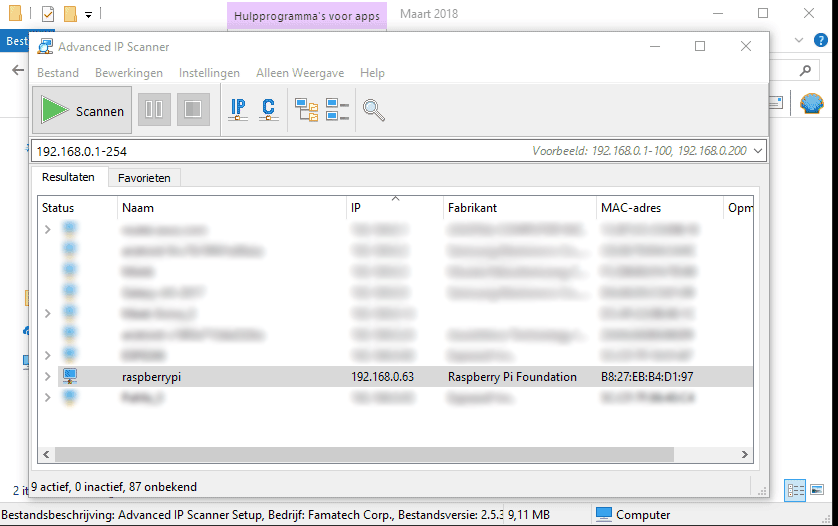
Power up and attach Raspberry on your local network and scan for the IP address of Raspberry with Advanced IP Scanner
Point Putty with SSH to the IP address found above
Login with user : pi
Password : raspberry
Type : sudo raspi-config
Expand file system by selecting <7 Advanced Options> – <A1 Expand Filesystem>
Change Time Zone by selecting <4 Localisation Options> – <I2 Change Timezone>
Obtaining the IP address of Raspberry PI/Domoticz instance
Plug the MicroSD card in the Raspberry PI
Connect the Raspberry PI to your rooter
Power on the Raspberry by connecting the power unit
Download and install/Execute Advanced IP Scanner ( https://www.advanced-ip-scanner.com/ )
Press Scan button and make note of the IP of the “ raspberrypi “
Open your browser and point to the IP address obtained in the previous step with the addition of the port number :8080. In our situation 192.168.0.63:8080
Never power off a Linux system without properly shutting it down. To shutdown the RPI with Putty “sudo poweroff“ or in Domoticz Goto – – , wait for a minute and (till the lights completely stop blinking) and only then, unplug the power cable from the Raspberry.